> ## Documentation Index
> Fetch the complete documentation index at: https://docs.chattermate.chat/llms.txt
> Use this file to discover all available pages before exploring further.

# Widget Integration

> Add the ChatterMate AI chat widget to any website in minutes with a one-line script snippet or iframe embed, with no code changes beyond pasting the snippet.

# Widget Integration

Add the ChatterMate chat widget to your website using either direct script integration or iframe embedding.
<Frame>
  <img src="https://mintcdn.com/chattermatechat/KuJSDVe8niV0oBYv/images/widget-integration.png?fit=max&auto=format&n=KuJSDVe8niV0oBYv&q=85&s=7ceaa79456f64581d4df9f3a4fd49bb1" alt="Widget Integration Options" width="876" height="432" data-path="images/widget-integration.png" />
</Frame>

## Integration Methods

### 1. Script Integration (Recommended)

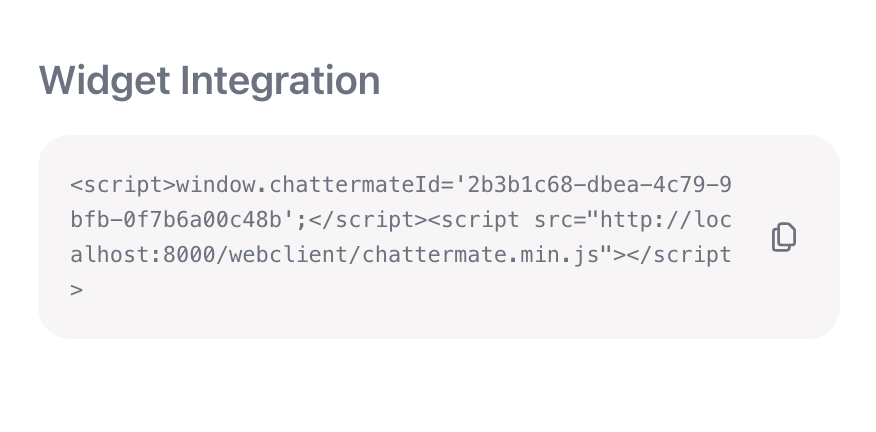
Add the following code snippet to your website's HTML, just before the closing `</body>` tag:

```html theme={null}
<script>
  window.chattermateId='YOUR_WIDGET_ID';
</script>
<script src="https://app.chattermate.chat/webclient/chattermate.min.js"></script>
```

Replace `YOUR_WIDGET_ID` with your unique widget identifier from the ChatterMate dashboard.

### 2. IFrame Integration

Alternatively, embed the chat widget using an iframe:

```html theme={null}
<iframe 
  src="https://api.chattermate.chat/api/v1/widgets/YOUR_WIDGET_ID/data"
  frameborder="0"
  width="450" 
  height="600"
  allow="clipboard-write">
</iframe>
```

<Note>
  The iframe method is useful for testing or when you need more control over the widget's placement and dimensions.
</Note>

## Widget Configuration

### Customization

```javascript theme={null}
// Update chat bubble color
window.postMessage({
  type: 'CUSTOMIZATION_UPDATE',
  data: {
    chat_bubble_color: '#f34611'  // Your brand color
  }
}, '*');
```

### Widget Position

By default the launcher sits 20px from the bottom-right corner. To move it — for example, to clear a fixed bottom navigation bar — initialize the widget with `ChatterMate.init()` and pass a `position`. Both values are in pixels, measured from the bottom and right edges of the screen. The chat window stays anchored above the launcher, and the offset applies on mobile too.

```html theme={null}
<script src="https://app.chattermate.chat/webclient/chattermate.min.js"></script>
<script>
  ChatterMate.init({
    id: 'YOUR_WIDGET_ID',
    position: { bottom: 100, right: 24 }
  });
</script>
```

You can also reposition the widget at any time after it has loaded — useful when your layout changes, such as a bottom bar appearing:

```javascript theme={null}
ChatterMate.setPosition({ bottom: 100, right: 24 });
```

<Note>
  `position` and `setPosition()` accept `bottom` and `right` in pixels. On mobile the chat window opens full-screen, so the offset controls where the closed launcher button sits — handy for keeping it clear of a bottom navigation bar.
</Note>

### Mobile Responsiveness

The widget automatically adapts to different screen sizes:

<CodeGroup>
  ```css Desktop theme={null}
  width: 400px;
  height: 600px;
  border-radius: 24px;
  ```

  ```css Mobile theme={null}
  width: 100%;
  height: 100vh;
  border-radius: 0;
  ```
</CodeGroup>

## Event Handling

The widget supports the following events:

### Token Management

```javascript theme={null}
// Listen for token updates from the widget
window.addEventListener('message', (event) => {
  if (event.data.type === 'TOKEN_UPDATE') {
    // Store the token securely
    const token = event.data.token;
    localStorage.setItem('ctid', token);
  }
});
```

### Scroll Control

```javascript theme={null}
// Scroll chat to bottom
window.postMessage({
  type: 'SCROLL_TO_BOTTOM'
}, '*');
```

## Security Features

<Warning>
  * Tokens are encrypted and stored securely
  * Communication uses postMessage for security
  * Automatic token management
  * Domain validation for widget loading
</Warning>

## Widget Features

### Customer Identification

* Email collection before chat starts
* Automatic returning customer detection
* Previous conversation history loading
* Context maintenance across sessions

### Chat Interface

* Real-time message updates
* Typing indicators
* Message status tracking
* File attachment support
* Markdown formatting support
* Emoji support

### Styling

The widget uses CSS variables for consistent theming:

```css theme={null}
:root {
  --primary-color: #f34611;
  --background-base: #ffffff;
  --text-color: #1F2937;
  --border-color: #E5E7EB;
  --radius-lg: 24px;
  --space-md: 16px;
  --space-sm: 8px;
}
```

## Testing Your Integration

### Test Project

We provide a sample test project at `github.com/chattermate/chattermate.chat/tree/main/chattermate-test`:

1. Clone and setup:

```bash theme={null}
git clone https://github.com/chattermate/chattermate.chat
cd chattermate-test
npm install
```

2. Start test server:

```bash theme={null}
npm start
```

3. Open `http://localhost:3000` and enter your widget ID

The test project demonstrates:

* Basic widget initialization
* Token management
* Style customization
* Mobile responsiveness

## Best Practices

1. **Implementation**
   * Add script just before closing body tag
   * Enable secure token storage
   * Test on multiple browsers
   * Verify mobile responsiveness

2. **Security**
   * Store tokens securely
   * Use HTTPS only
   * Implement proper CSP headers
   * Enable domain restrictions

3. **User Experience**
   * Test email collection flow
   * Verify history loading
   * Check offline behavior
   * Test connection handling

## Troubleshooting

<AccordionGroup>
  <Accordion title="Token Issues">
    * Verify localStorage access
    * Check token storage events
    * Clear stored tokens and retry
    * Verify domain permissions
  </Accordion>

  <Accordion title="Display Problems">
    * Check CSS variables
    * Verify mobile breakpoints
    * Test iframe dimensions
    * Validate color codes
  </Accordion>

  <Accordion title="Connection Issues">
    * Verify widget ID
    * Check network connectivity
    * Test WebSocket connection
    * Validate API endpoints
  </Accordion>
</AccordionGroup>

## What's Next?

After integrating the widget:

1. Test customer identification flow
2. Verify conversation persistence
3. Monitor connection stability
4. Test mobile responsiveness

<Card title="Human Agents" icon="user-headset" href="/features/human-agents">
  Next: Learn how to manage human agents
</Card>
