Messenger
ChatterMate is an official Meta integration for Messenger. Connect a Facebook Page and your AI agent answers the direct messages people send it on Messenger. Replies land in the same Conversations inbox as every other channel, and a human can take over at any point. There are two ways to connect, depending on how you run ChatterMate:Sign in with Facebook
ChatterMate Cloud. Pick your Page from a list — no Meta app, no tokens.
Enter credentials manually
Self-hosted, or anyone using their own Meta app. Paste a Page ID and access token.
On ChatterMate Cloud, connecting is a few clicks. Facebook Login for Business
connects your Page under ChatterMate’s reviewed Meta app, so there is no Meta app to
create, no Page access token to generate, and nothing to configure in the Meta
dashboard — sign in with Facebook, pick your Page, assign an agent, and you’re live.
It’s open to every Cloud account. The manual path below is for self-hosters and anyone
who prefers their own Meta app.
How Messenger messaging works
Messages arrive as PSIDs (Page-scoped user IDs), so the same person has a different ID for every Page they message. Messenger has a 24-hour standard messaging window: you can reply freely for 24 hours after the customer’s last message, and outside it only specific message tags are allowed.Connect by signing in with Facebook
1
Open the Messenger card
Go to Settings → Integrations and click Connect on the Messenger card, then Continue with Facebook.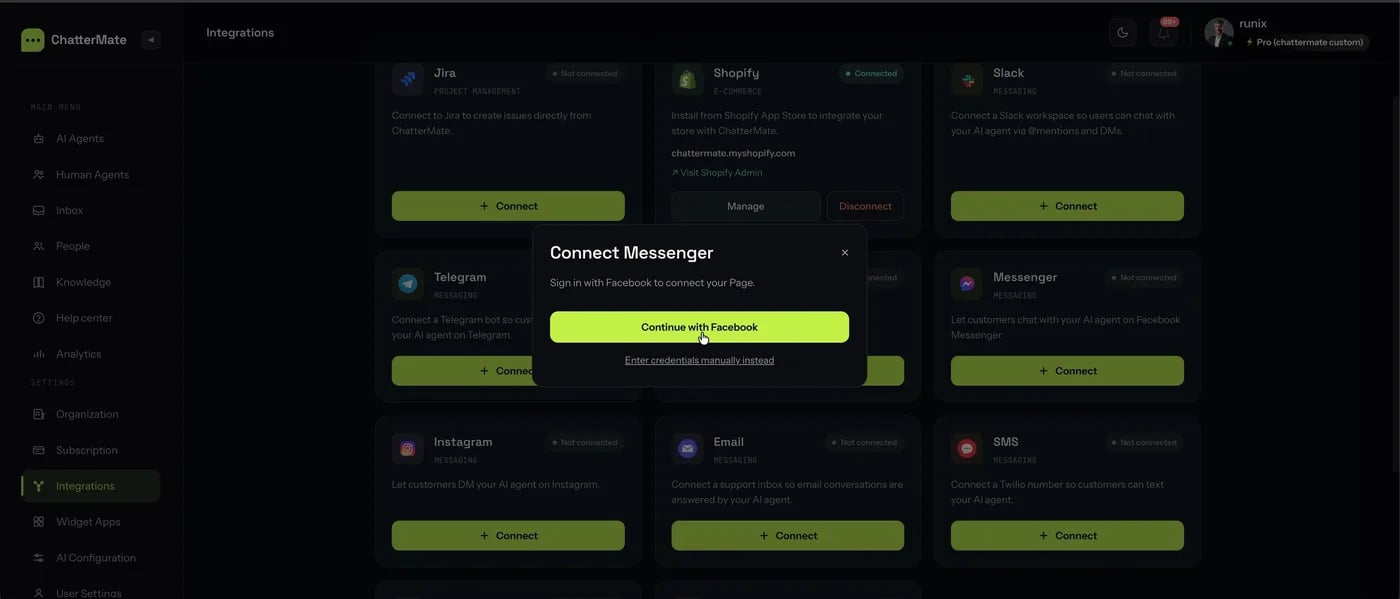
2
Grant your Page
A Facebook window opens. Sign in as someone who administers the Page and tick the Page you want ChatterMate to answer for.
3
Choose the Page
If you administer more than one Page, ChatterMate lists them so you can pick. With a single Page this step is skipped.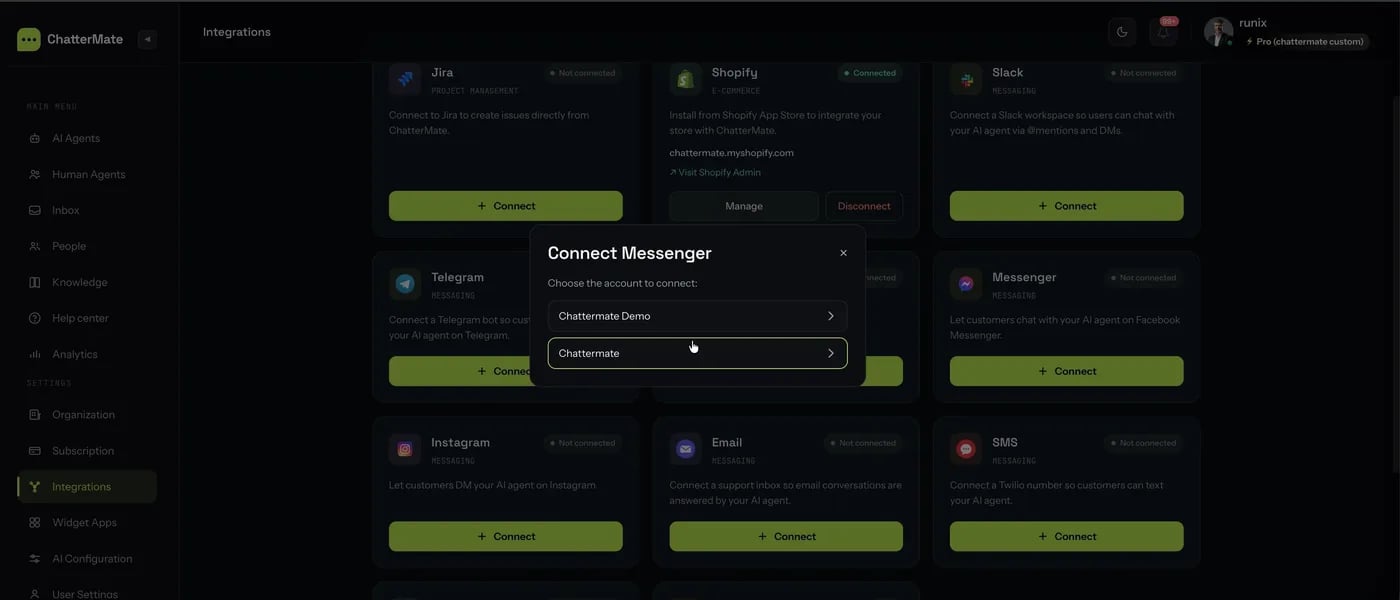
4
Assign an AI agent
Choose the agent that answers this Page and click Assign agent.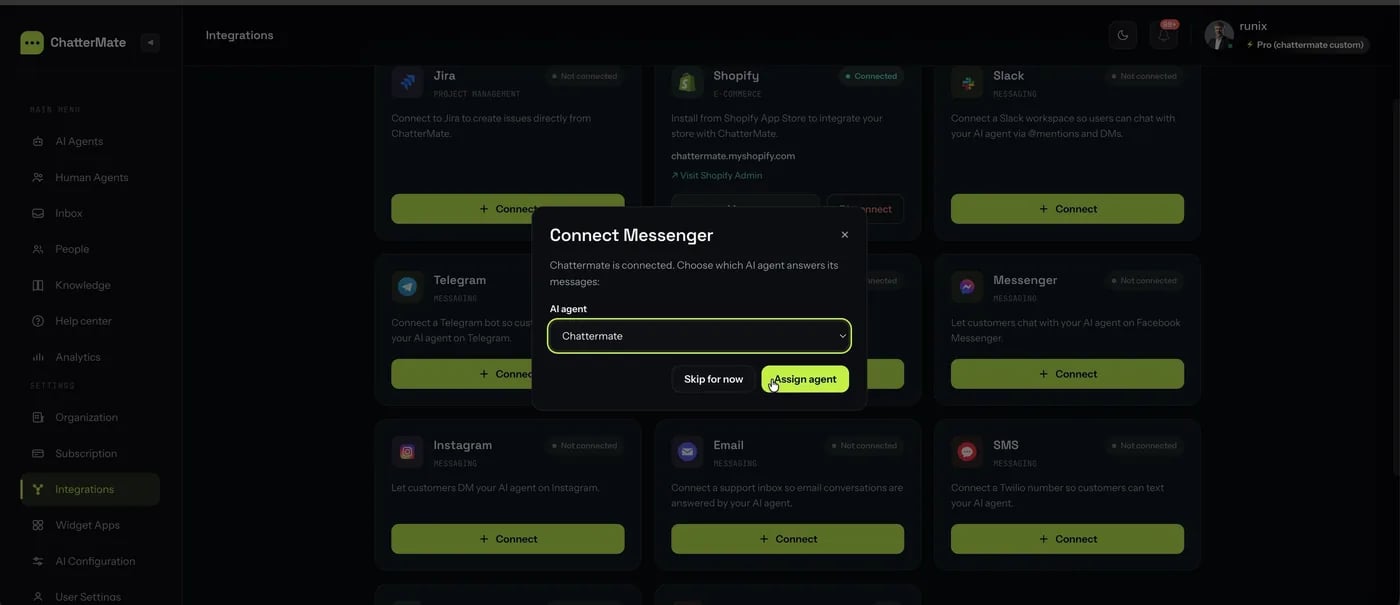
ChatterMate subscribes the Page to the messaging webhooks for you, so there is nothing to configure in the Meta dashboard.
Connect with your own Meta app
Use this if you self-host, or if you’d rather keep the integration under your own Meta app.Step 1 — Set up a Meta app
If you already created a Meta app for WhatsApp or Instagram, skip to step 2 — Messenger uses the same app.1
Create a Business app
Go to developers.facebook.com → My Apps → Create App → Business.
2
Business Verification
Complete Business Verification in business.facebook.com → Security Center. It takes a few days to about two weeks, so start it first.
3
Add the Messenger product
Add the Messenger product in the app dashboard and link your Facebook Page.
4
Set the webhook
Under Messenger → Settings → Webhooks, set the callback URL to
https://<your-domain>/api/v1/webhooks/meta with your META_WEBHOOK_VERIFY_TOKEN, and subscribe your Page to the messages and messaging_postbacks fields.Step 2 — Copy your Page credentials
From Messenger → Settings in the app dashboard:Step 3 — Enter them in ChatterMate
Open the Messenger card in Settings → Integrations, choose Enter credentials manually instead, and paste both values. ChatterMate encrypts them at rest and verifies the signature on every inbound webhook.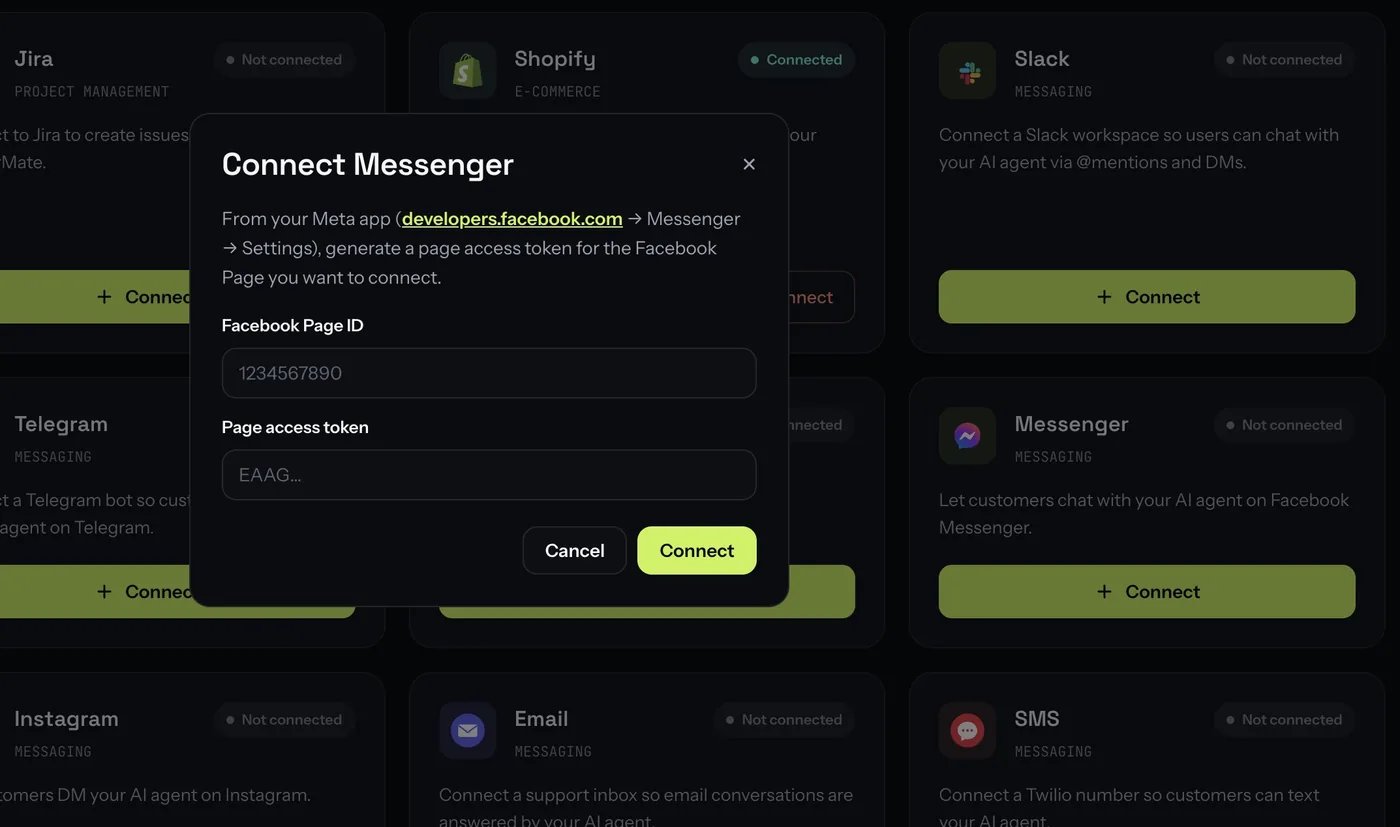
Step 4 — App Review
To message people who don’t have a role on your Meta app, submit App Review for:pages_messagingpages_manage_metadatapages_show_listbusiness_management
Test it
Message your Page from Facebook. If you signed in with Facebook on ChatterMate Cloud, message it from any account — app review is already done. If you connected with your own Meta app, only accounts with a role on that app can reach it until your own app review completes.