

Slack
Connect a Slack workspace and your AI agent answers @mentions in channels and direct messages to the bot. Replies stay in-thread, teammates can take over from the ChatterMate inbox, and the agent shows real display names and a typing indicator.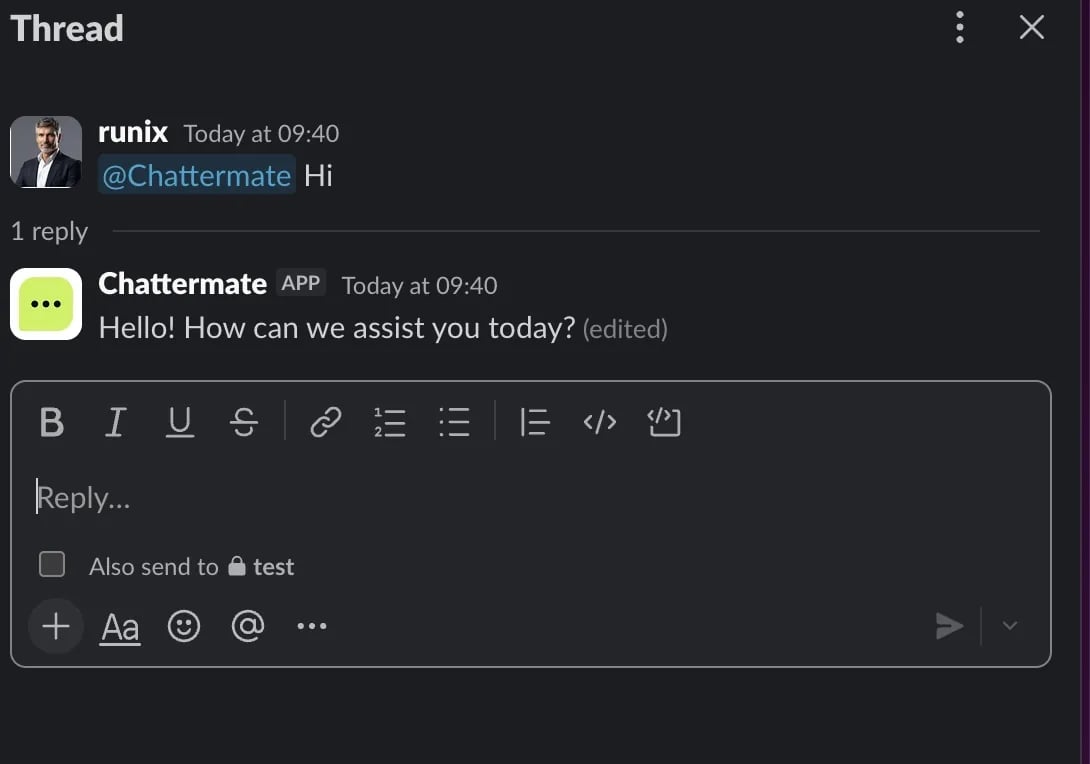
@mention the bot in any channel — it answers in the thread.
Two ways to connect
- ChatterMate Cloud — click Connect, approve the OAuth popup, done. No app to create; skip Step 1 below.
- Self-hosted — create your own Slack app once (below), set three environment variables, then connect via OAuth.
Step 1 — Create a Slack app (self-hosted only)
1
Create the app
Go to api.slack.com/apps → Create New App → From scratch. Name it ChatterMate and pick your workspace.
2
Add bot scopes
Under OAuth & Permissions → Bot Token Scopes, add exactly these four:
app_mentions:read, chat:write, im:history, users:readThat’s the full set ChatterMate uses — receive @mentions, post replies, read direct messages, and resolve real display names instead of raw user IDs. Nothing more is requested.3
Set the OAuth redirect URL
Still under OAuth & Permissions, add a Redirect URL:
https://<your-domain>/api/v1/channels/slack/callback4
Enable Event Subscriptions
Under Event Subscriptions, turn it on and set the Request URL to:
https://<your-domain>/api/v1/webhooks/slackThen subscribe to these bot events:Slack sends a one-time challenge to verify the URL — ChatterMate answers it automatically.
5
Turn on the App Home
Under App Home, enable the Home Tab and the Messages Tab (leave Allow users to send Slash commands and messages from the messages tab on). This powers the App Home card and the welcome message.
6
Copy the app credentials
From Basic Information, copy the Client ID, Client Secret, and Signing Secret, and set them as environment variables:
No Slack approval is required to install your own app. A Slack Marketplace listing (to appear in the public directory) is optional and Cloud-only — it triggers Slack’s security review and takes a few weeks. Self-hosters never need it.
Step 2 — Connect in ChatterMate
1
Start OAuth
Go to Settings → Integrations and click Connect on the Slack card. A Slack authorization popup opens.
2
Approve and choose the workspace
Approve the requested permissions and pick the workspace to install into. ChatterMate stores the bot token encrypted — no manual credential entry.
3
Assign an AI agent
After the popup closes, ChatterMate asks which AI agent answers this workspace. Choose one and click Assign agent. You can change it later from the card’s Manage button.
Step 3 — Test it
Invite the bot to a channel and @mention it, or send it a direct message. The AI agent replies in-thread and the conversation appears in Conversations with a Slack badge. Click Take Over Chat to reply as a human — your messages post back into the same Slack thread.The App Home
Open the app from the Slack sidebar to see its Home tab — a quick summary of what ChatterMate does, which AI agent is connected to the workspace and whether it’s online, how to reach it, and a link straight to your dashboard.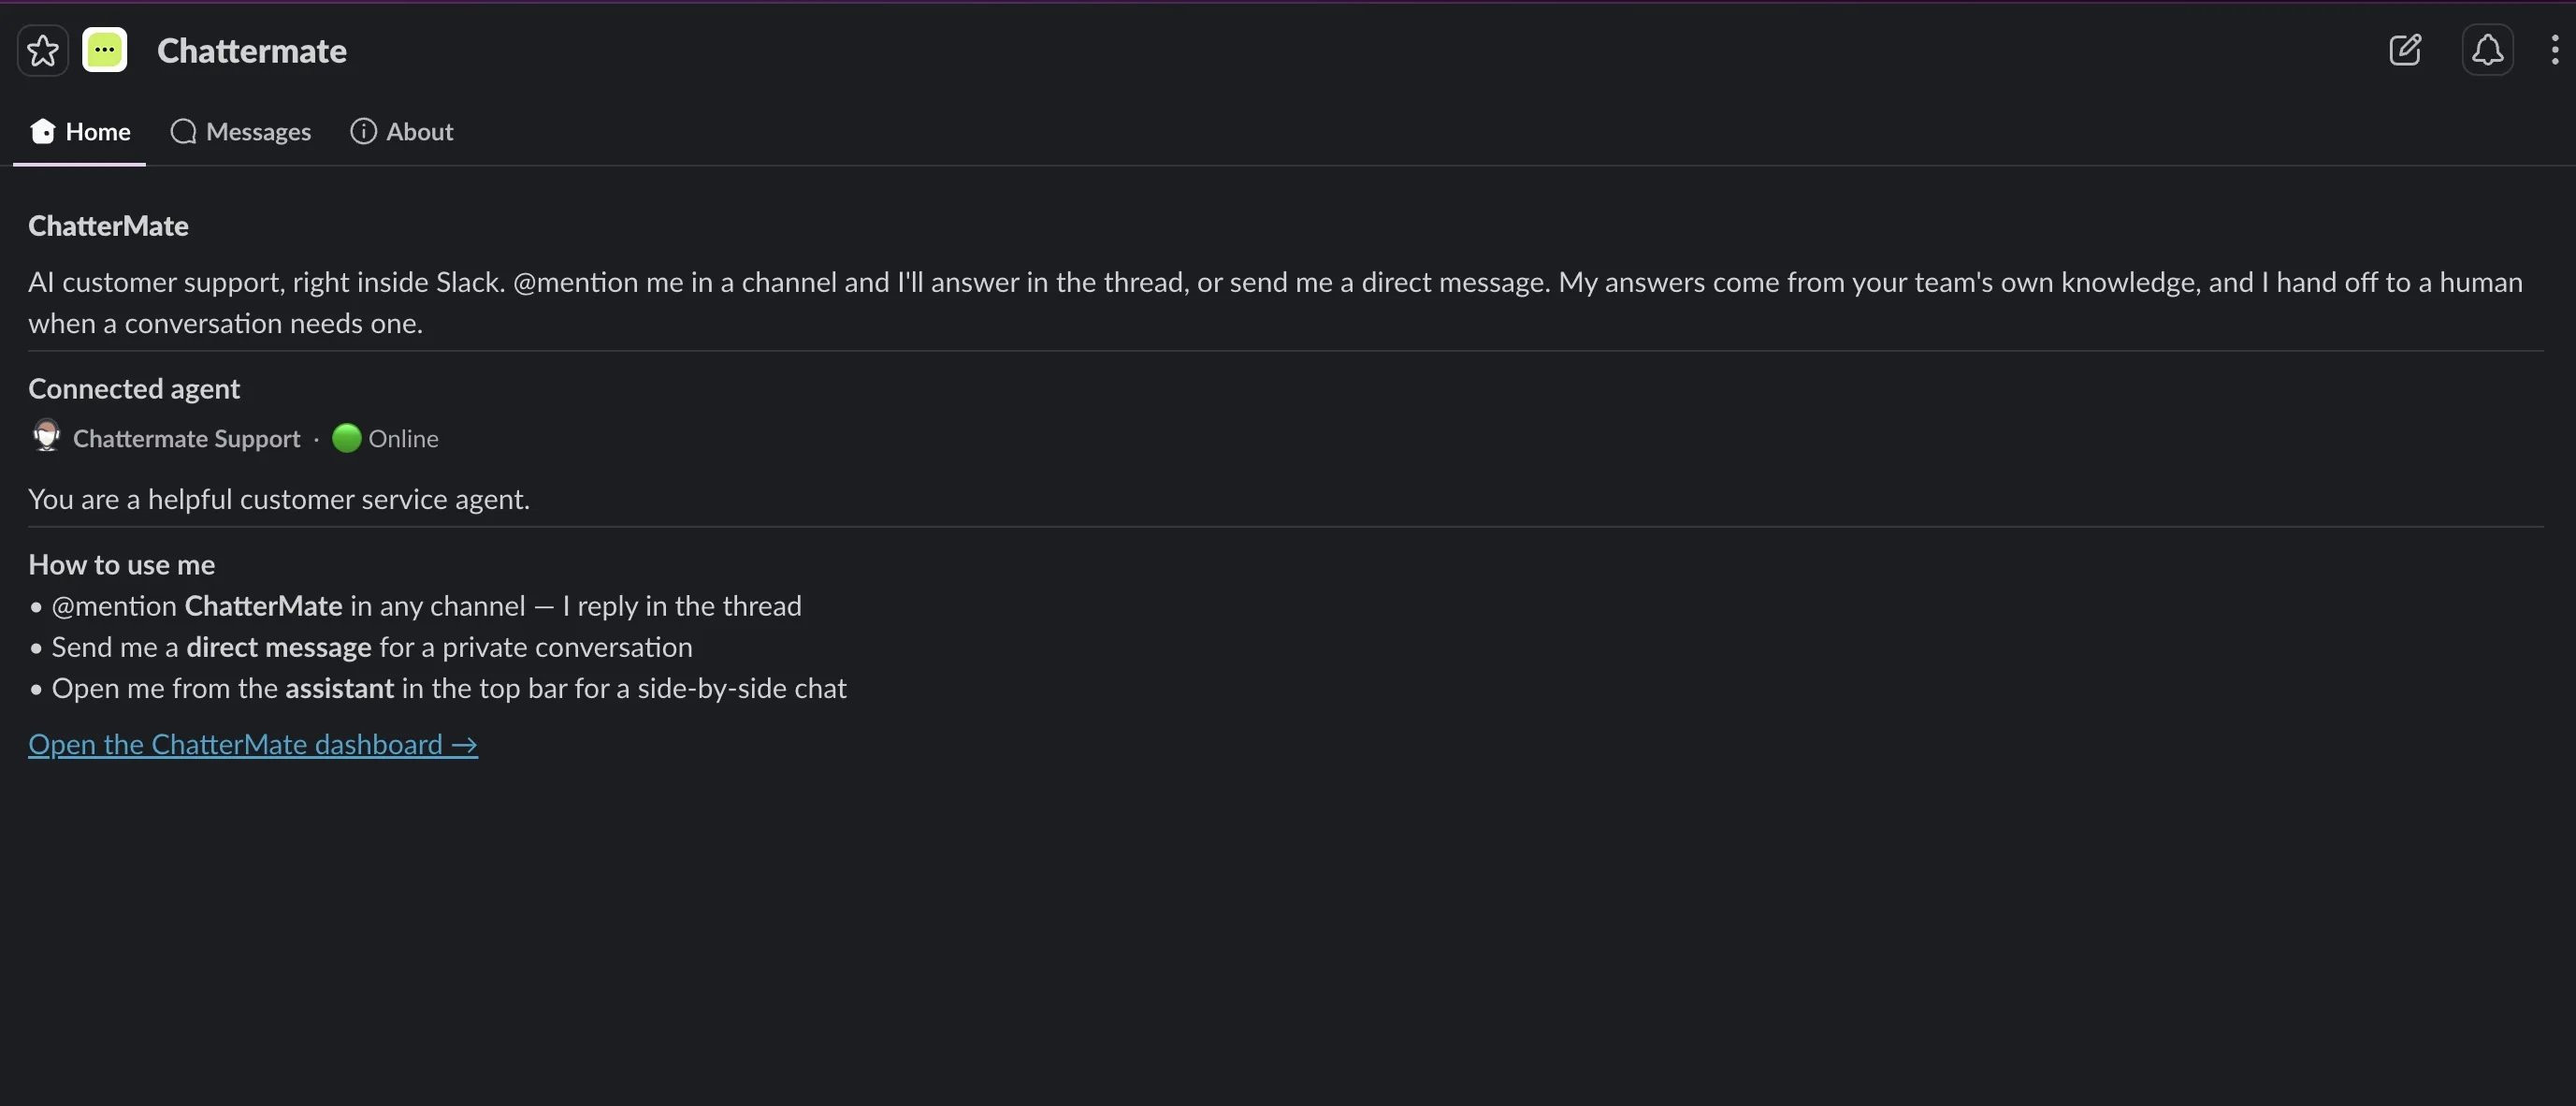
The Home tab: what ChatterMate does, the connected agent, and how to use it.