

In-app actions
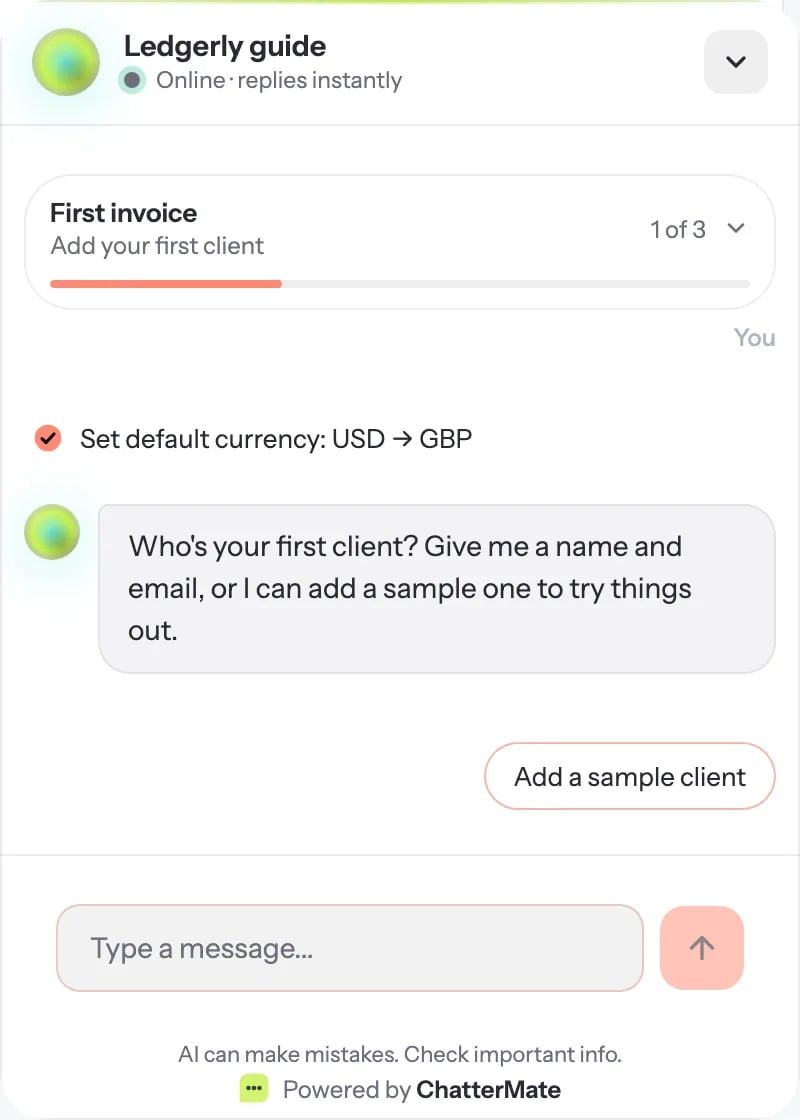
In-app actions let your agent do things inside your web app for the user who is signed in. For example, it can switch their currency, add a client or send an invoice. The user doesn’t have to go and find the right screen. You declare each action in ChatterMate. Your page supplies the code that runs it. The agent can only call actions that are both declared and registered by the page that is open, and only in the chat widget on your own site.Runs as the user
The code runs in your page, with the user’s own session. Your API checks permissions
exactly as it does for a click.
Asks first
Risky actions show a confirm card. The model can’t press it for the user.
Configurable by AI
Everything here can also be set up with the CLI or the
MCP server.
How it works
1
Declare the action
On the agent’s Actions tab, say what the action is called, what it does and what
arguments it takes.
2
Register the code on your page
Call
ChatterMate.registerActions({ name: handler }) in your app. The widget tells
ChatterMate which declared actions this page can run.3
The agent calls it
When the user asks for something an action can do, the model calls it. ChatterMate
checks the arguments against your schema. If the action asks first, the widget shows a
confirm card. Then your handler runs in the page.
4
The result goes back to the agent
Whatever your handler returns is passed to the model, which replies. A line in the chat
records what was done.
1. Declare actions
Open AI Agents → your agent → Actions and click New action.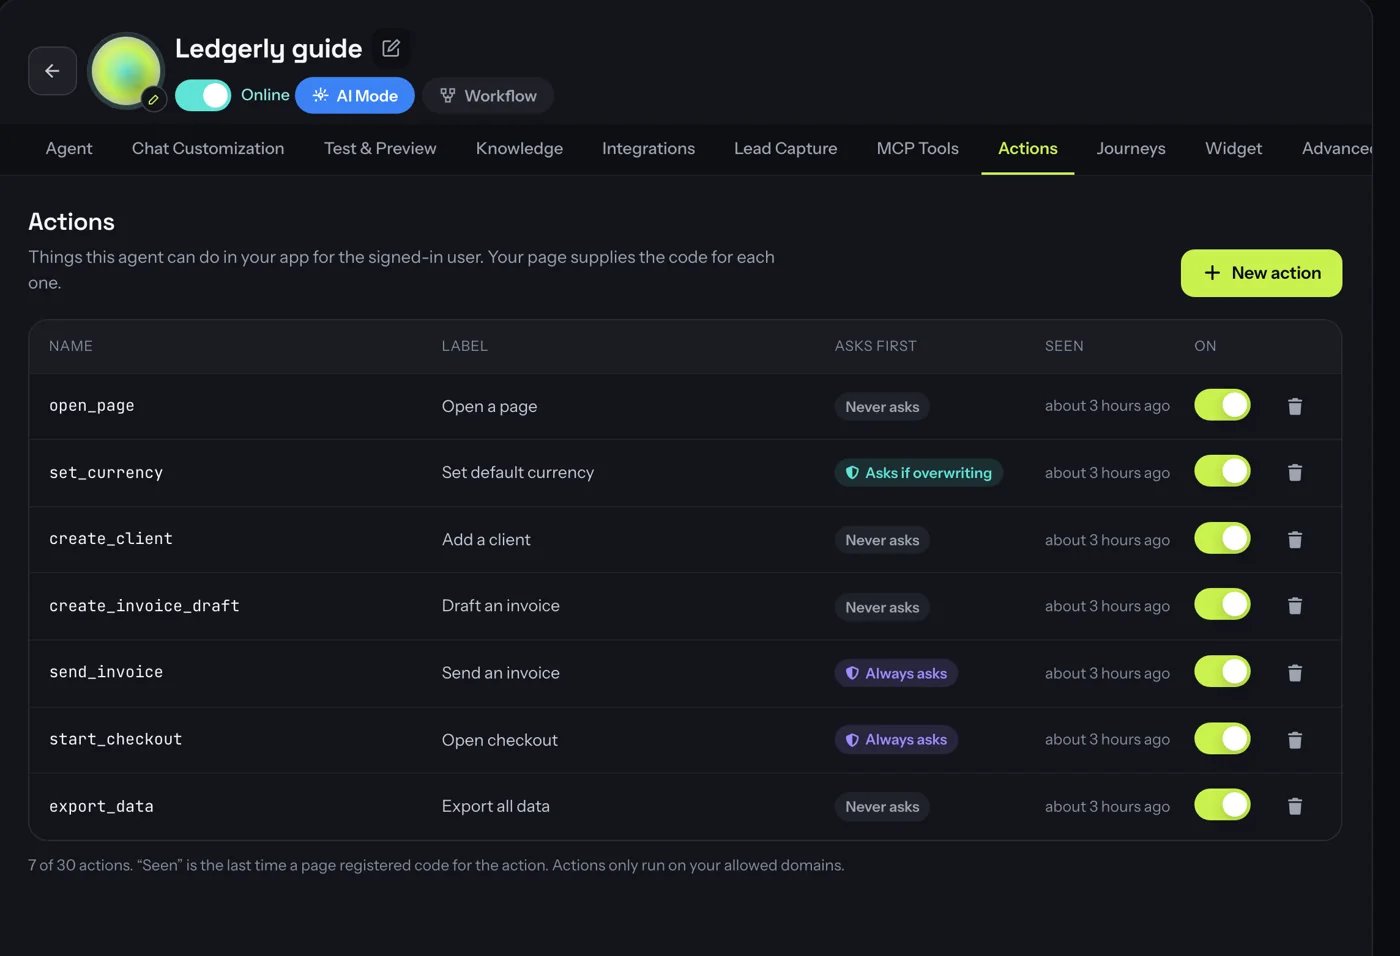
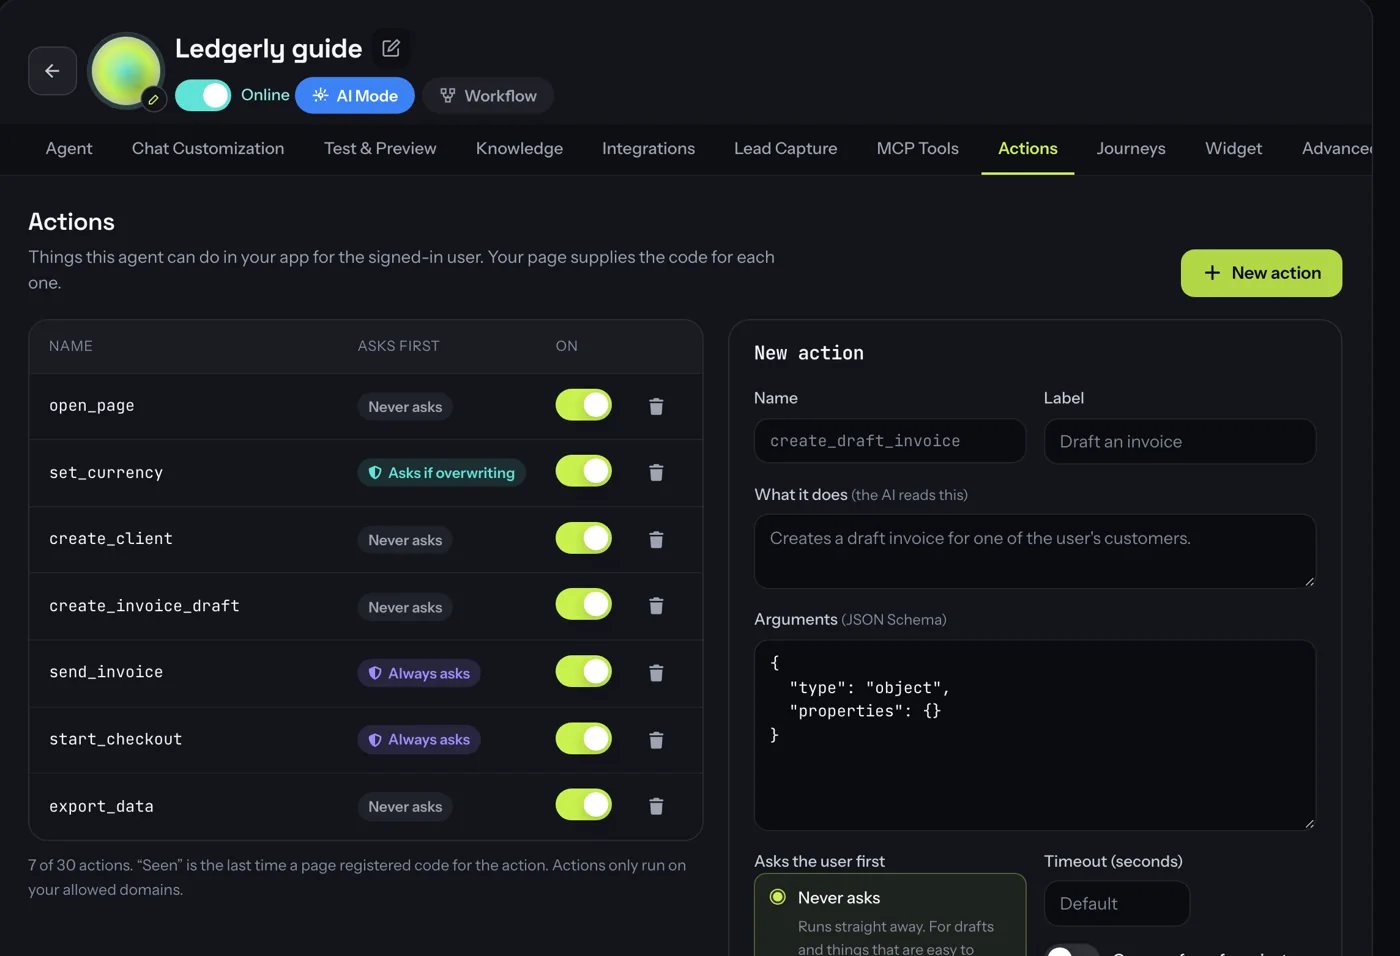
The Seen column shows the last time a page registered code for the action. Not yet means
no page has offered it, so the agent can’t use it. Use the toggle to turn an action off without
deleting it.
The Free plan allows 3 actions per agent. Paid plans allow more; the count is shown under the
table.
2. Limit the widget to your site
Actions only run when the widget is limited to the site it is on. Open the agent’s Widget tab and add your app’s domain under Allowed domains.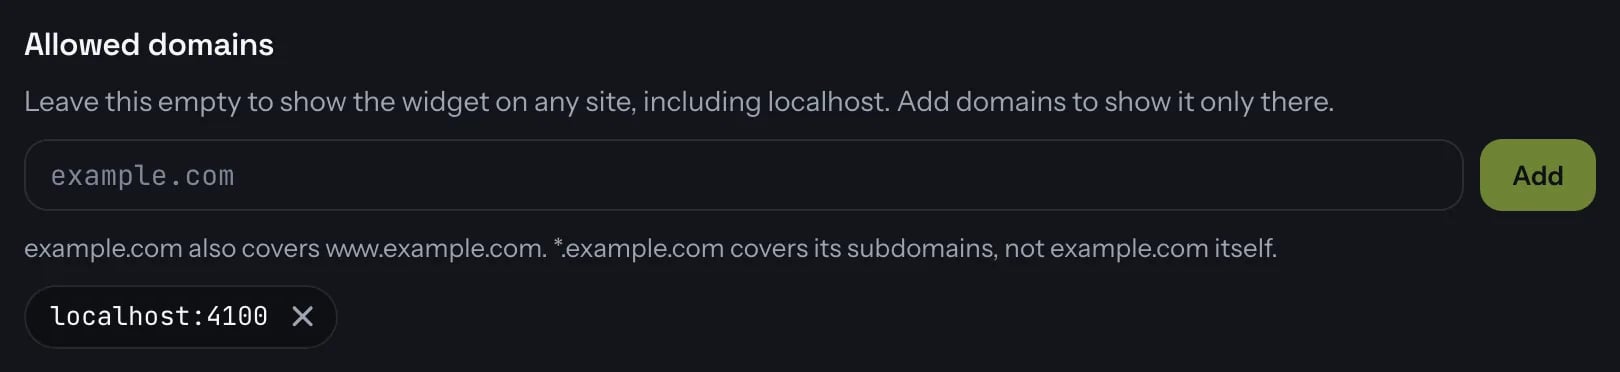
example.com also covers www.example.com. *.example.com covers its subdomains but not
example.com itself. If the list is empty, the widget loads anywhere and in-app actions are
off.
3. Register the code on your page
Add the widget script as usual, then register a handler for each action. A handler is anasync function that gets the arguments and returns a result:
- Return plain JSON. It goes to the model as data. A
summarystring becomes the line shown in the chat. - Throw an error to fail. The message (up to 200 characters) goes to the model, which tells the user what went wrong.
- Each call runs once. If the widget reconnects in the middle of a call, the page sends back the result it already has rather than running the handler again.
- Call
ChatterMate.unregisterActions()when the user signs out, or when the page hands the widget to another agent.
Confirm cards
The confirm card is drawn by the widget, not written by the model, so a reply can’t approve an action for the user.- Asks if overwriting
- Always asks
The widget calls your 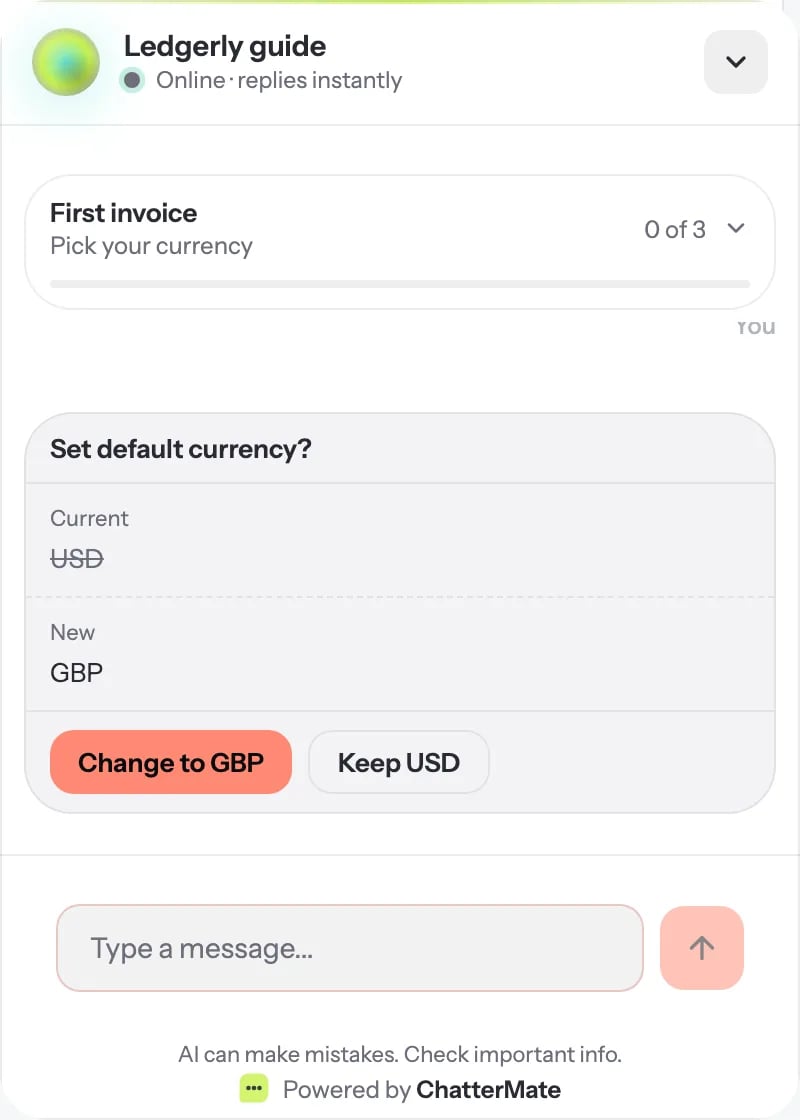
preview(args). If it returns { before, after }, the user sees the
current and new values. The buttons say what happens: Change to GBP or Keep USD.
If preview returns null (nothing would change), the action runs straight away.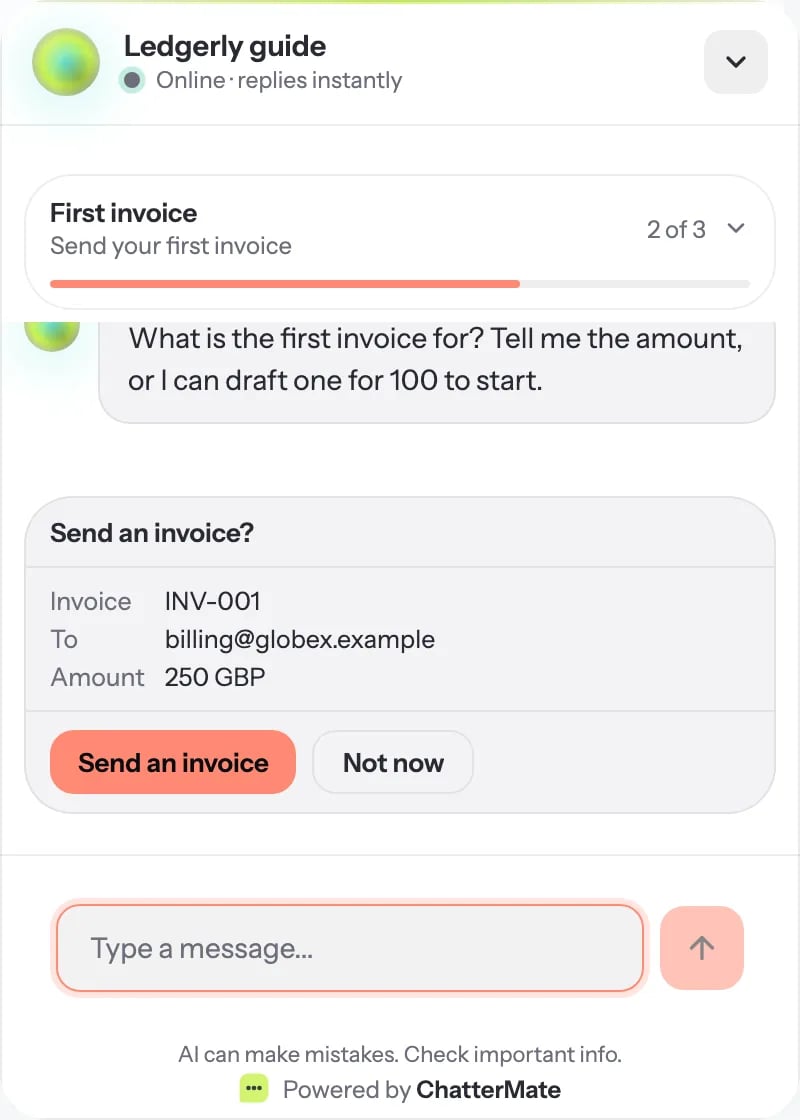
Tell the agent what’s on screen
setContext passes page state the agent can use, such as the plan the user is on or the screen
they are looking at:
- Values are short strings, numbers or booleans. There can be up to 50 keys and 4 KB in total.
Keys are
lowercase_with_underscores. - Page context is not verified. The agent treats it as information, never as permission. To
say who the user is, use the identity token: its fields are the verified
user.*values. - Call it again whenever the state changes; the latest values replace the old ones.
More from the page
Safety
- Allowlist only. The model is offered only actions that are declared, turned on and registered by the open page, on a widget limited to your domains.
- Validated arguments. Arguments are checked against your schema on the server before the page sees them.
- No secrets in chat. The chat box holds back messages that look like passwords, API keys or card numbers. Use Only opens a form for sensitive data, so it is only ever typed into your own form.
- Fenced data. Page context and action results reach the model as data, not instructions, so text on a page can’t take over the agent.
- Not on other channels. Actions are offered in the website widget only, never on WhatsApp, email or other channels.
Set it up with the CLI or an AI assistant
Next steps
Journeys
Walk new users through setup step by step, using your actions.
Widget integration
Embed the widget and identify signed-in users.